Easy Chicken Piccata Recipe: A 30-Minute Weeknight Favorite
Chicken Piccata is one of those dishes that feels special enough for company but is so delightfully simple, you can whip it up on a Tuesday night. It’s a classic for a reason, bringing together tender pan-fried chicken with a zesty, bright sauce that’s truly irresistible. Just imagine: a quick weeknight meal that tastes like it came from your favorite trattoria, ready from start to finish in about 30 minutes.
This recipe is all about bringing a touch of everyday elegance to your table. It’s the kind of meal that makes everyone say “Wow,” and the best part is, it’s incredibly straightforward. We’ll walk through every step to ensure you achieve that perfect golden chicken and luscious lemon-butter-caper sauce, making Chicken Piccata your new go-to favorite.
What is Chicken Piccata?
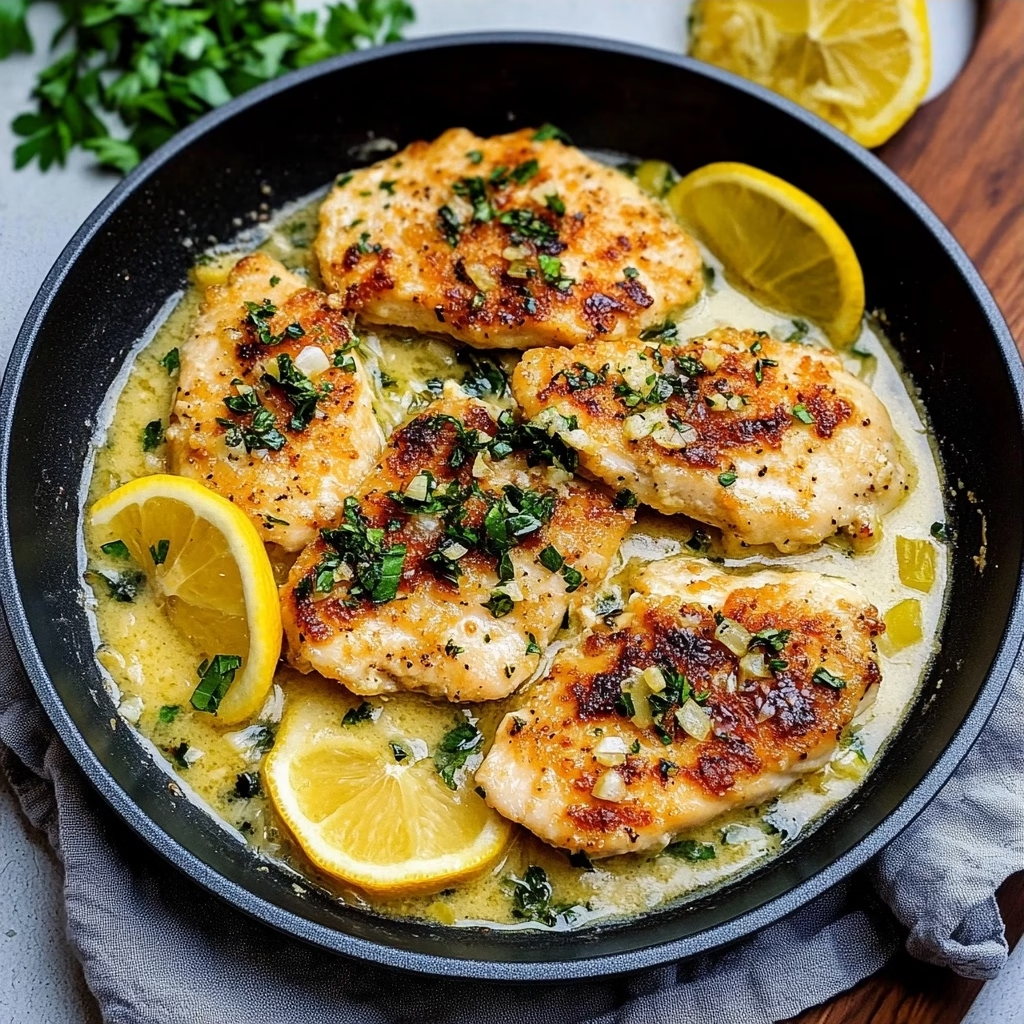
At its heart, Chicken Piccata is an Italian-inspired dish featuring thinly cut chicken cutlets, pan-fried until golden and crispy, and served with a vibrant sauce. The name “piccata” itself refers to the Italian culinary term for meat that has been pounded thin and then sautéed. This method ensures the chicken cooks quickly and evenly, remaining wonderfully tender.
What makes Chicken Piccata truly sing is its signature sauce. It’s a harmonious blend of bright lemon juice, savory chicken broth, rich butter, and the distinctive briny pop of capers. Often finished with a scattering of fresh parsley and sometimes thin lemon slices, it’s a dish that balances simple, satisfying flavors with a touch of sophistication. It’s a testament to how a few quality ingredients can create something truly memorable.
Reasons to Try Chicken Piccata
If you’re searching for a dinner that’s both quick and impressive, Chicken Piccata has to be on your list. It’s incredibly forgiving for beginner cooks, yet sophisticated enough for entertaining. The speed at which it comes together, usually under 30 minutes, makes it a lifesaver on busy evenings when you want a comforting, delicious meal without spending hours in the kitchen.
Beyond its speed and ease, the taste is what keeps people coming back. The contrast between the savory, slightly crisp chicken and the tangy, buttery sauce is simply divine. It’s a versatile dish that pairs wonderfully with so many sides, from simple pasta to roasted vegetables, making it suitable for family dinners or special occasions alike. It’s a recipe that brings joy and eases the stress of meal prep.
Ingredients Needed to Make Chicken Piccata
- 1 pound boneless, skinless chicken breasts (sliced horizontally and pounded thin to about 1/4-inch thickness)
- Kosher salt and freshly ground black pepper (for seasoning the chicken)
- 1 cup all-purpose flour (for dredging)
- 1 cup panko bread crumbs (for a crispier coating)
- 1 teaspoon lemon zest (adds an extra layer of citrus aroma)
- 2 large eggs (beaten with 1 tablespoon water for the egg wash)
- 3 tablespoons unsalted butter (for pan-frying the chicken)
- 2 tablespoons olive oil (helps prevent butter from burning during frying)
- 3 cloves garlic (minced, for the sauce base)
- 1 1/2 cups chicken broth (low-sodium preferred)
- 4 tablespoons unsalted butter (for the luscious sauce)
- 3 tablespoons fresh lemon juice (key for that bright tang)
- 3 tablespoons jarred capers (drained, for that signature briny flavor)
- Kosher salt and freshly ground black pepper (to taste, for the sauce)
- 1 large lemon, thinly sliced (for garnish and extra lemon flavor)
- Freshly chopped parsley (for garnish and a pop of color)
Instructions to Make Chicken Piccata – Step by Step
Step 1: Preparing the Chicken
Begin by getting your chicken ready for its delightful transformation. If your chicken breasts are thick, you’ll want to slice them horizontally to create thinner cutlets. Then, place each cutlet between two pieces of plastic wrap or inside a zip-top bag and gently pound them with a rolling pin or a meat mallet until they’re an even 1/4-inch thick. This ensures they will cook quickly and evenly. Once pounded, season both sides generously with kosher salt and freshly ground black pepper. This initial seasoning is crucial for building flavor from the inside out.
Step 2: Setting Up for Breading
Now, let’s set up your dredging station, which is key for that lovely crispy coating. On a large plate or in a shallow dish, spread out the all-purpose flour. In a second shallow dish, whisk together the eggs with a tablespoon of water until well combined; this is your egg wash. On a third large plate or shallow pan, mix the panko bread crumbs with the lemon zest. This little touch of zest adds a wonderful hint of citrus to the coating.
Step 3: Breading the Chicken
It’s time to coat our chicken cutlets. Take one seasoned chicken cutlet and dredge it first in the flour, making sure to coat both sides completely. Gently shake off any excess flour. Next, dip the floured chicken into the egg wash, letting any excess drip off. Finally, press the cutlet into the panko-lemon zest mixture, ensuring it’s thoroughly coated on both sides. Place the breaded cutlets on a clean plate or baking sheet as you finish, repeating this process for all the remaining chicken.
Step 4: Pan-Frying the Chicken
Heat a large skillet, preferably cast iron, over medium-high heat. Add the 3 tablespoons of unsalted butter and 2 tablespoons of olive oil. Once the butter is melted and the oil is shimmering, carefully add the breaded chicken cutlets to the hot skillet. Be sure not to overcrowd the pan; cook in batches if necessary. Sauté the chicken for about 3 to 5 minutes per side, until it’s beautifully golden brown and cooked through. Transfer the perfectly browned chicken to a clean plate and set it aside while you make the sauce.
Step 5: Crafting the Luscious Sauce
In the same skillet you used for the chicken, lower the heat slightly to medium. Add the minced garlic and cook for about 1 minute until fragrant, being careful not to burn it. Pour in the chicken broth and bring it to a simmer. Let the broth reduce by about half, which will concentrate its flavor; this usually takes about 5 minutes. Once reduced, reduce the heat to low. Stir in the remaining 4 tablespoons of unsalted butter, the fresh lemon juice, and the drained capers. Whisk gently until the butter is completely melted and the sauce is smooth and emulsified. Taste and season with salt and pepper as needed.
Step 6: Finishing and Serving
Now it’s time to bring it all together. Gently place the pan-fried chicken cutlets back into the skillet with the sauce. Let them simmer gently in the sauce for about 3 to 5 minutes, allowing the chicken to rewarm and the flavors to meld beautifully. Spoon some of the luscious sauce over the chicken as it simmers. Just before serving, arrange the thin lemon slices on top of the chicken and sprinkle generously with freshly chopped parsley. Serve your amazing Chicken Piccata warm, perhaps with your favorite pasta or some crusty bread to soak up all that delicious sauce.
Chef’s Tips for a Perfect Result
- Ensure chicken cutlets are pounded to an even thickness for consistent cooking. This prevents some parts from being overcooked while others are still raw.
- Don’t skip the lemon zest in the panko mixture; it adds a subtle aromatic depth that complements the lemon juice in the sauce beautifully.
- When pan-frying, make sure your skillet is hot enough before adding the chicken. This guarantees a lovely golden-brown crust without the chicken absorbing too much oil.
- Resist the urge to over-stir the sauce once the butter is added. Gentle whisking helps create a smooth, emulsified sauce rather than breaking it.
- Taste and adjust seasoning for the sauce before returning the chicken. This is your last chance to perfect the balance of salt, pepper, and lemon.
- For extra brightness, consider adding a splash of fresh lemon juice to the sauce right before serving.
Variations and Substitutions
- Gluten-Free Alternative: Use a gluten-free flour blend for dredging and gluten-free bread crumbs (like almond flour or certified GF panko) for the coating. Ensure your broth is also certified gluten-free. The texture will be slightly different but still delicious.
- Herb Variations: Fresh dill or chives can be finely chopped and added along with the parsley for a different herbal note. A pinch of dried oregano or thyme can also be added to the flour dredge for another layer of flavor.
- Creamy Piccata: For a richer sauce, stir in a tablespoon or two of heavy cream or a dollop of mascarpone cheese at the very end of making the sauce, just before adding the chicken back. This makes the sauce extra decadent.
- Vegetable Addition: Sautéed mushrooms or thinly sliced bell peppers can be added to the sauce after the garlic and before the broth for added vegetables and texture.
- Caper Substitute: While capers are distinctive, if you can’t find them, you can omit them or try a small amount of finely chopped green olives. The flavor won’t be identical, but it will still be a tasty lemon-butter sauce.
How to Serve and Pair
Chicken Piccata is wonderfully versatile and pairs beautifully with a variety of accompaniments. A classic choice is to serve it over a bed of angel hair pasta or spaghetti, allowing the strands to catch every bit of that delightful lemon-butter sauce. For a lighter option, it’s fantastic alongside steamed or roasted asparagus, broccoli, or green beans. Creamy mashed potatoes or simple boiled new potatoes also make a comforting base.
Presentation-wise, spooning a bit of the sauce over the chicken and garnishing with those thin lemon slices and fresh parsley adds a lovely visual appeal. This dish is perfect for a relaxed family dinner, a delightful lunch, or even a more elegant meal when friends come over. It’s a taste of sunshine on a plate, adaptable to almost any occasion.
Storage and Reheating
Refrigerator
Leftover Chicken Piccata will keep well in the refrigerator for up to 3 to 4 days. Ensure it has cooled completely before transferring it to an airtight container to prevent excess moisture from forming. This helps maintain the chicken’s texture and prevents the sauce from becoming watery.
Freezer
Freezing Chicken Piccata is possible, though the texture of the breaded chicken might become a bit softer upon thawing. If freezing, store in airtight containers or heavy-duty freezer bags, separating layers with parchment paper if necessary. It should remain good in the freezer for up to 2 months. Thaw overnight in the refrigerator before reheating.
Room Temperature
It is not recommended to leave cooked Chicken Piccata at room temperature for more than 2 hours. After this time, the risk of bacterial growth increases significantly, and it should be discarded.
Reheating
The best way to reheat Chicken Piccata to retain its flavor and texture is on the stovetop. Gently warm it in a skillet over medium-low heat, adding a splash of chicken broth or water if the sauce seems dry. You can also reheat it in a preheated oven at around 350°F (175°C), covered loosely with foil. Microwaving is an option for speed, but it can make the chicken drier and the breading less crisp.
Nutritional Values
- Calories: 638kcal
- Protein: 34g
- Carbohydrates: 46g
- Fat: 29g
- Fiber: 2g
Approximate values.
Frequently Asked Questions (FAQ)
Can I substitute the chicken breasts?
Yes, you can substitute chicken thighs for chicken breasts. They will require a slightly longer cooking time to ensure they are thoroughly cooked through, and they will offer a richer, more moist flavor profile.
How do I know when the chicken is fully cooked?
The chicken is fully cooked when it is no longer pink in the center and the juices run clear. For pounded cutlets, this is usually around 3-5 minutes per side when pan-fried at medium-high heat.
My sauce is too thin, what can I do?
If your sauce is too thin, you can simmer it for a few more minutes to reduce it further. Alternatively, you can create a slurry by mixing 1 tablespoon of cornstarch or flour with 2 tablespoons of cold water, then whisking it into the simmering sauce until thickened.
Can I prepare parts of this recipe in advance?
You can butterfly and pound the chicken breasts a day ahead and store them in the refrigerator. The dry ingredients for the breading can also be measured out, but it’s best to bread the chicken just before cooking for optimal crispiness.
What is the best way to serve Chicken Piccata for a crowd?
For a crowd, prepare the chicken in batches and keep it warm in a low oven (around 200°F/95°C) while you make the sauce. Combine everything in a large serving dish or a wide, shallow pot and garnish before bringing it to the table.
CONCLUSION
This Chicken Piccata recipe offers a delightful combination of tender, crispy chicken and a bright, comforting lemon-butter caper sauce. It’s a wonderfully simple dish that transforms everyday ingredients into something truly special, perfect for any busy weeknight. That signature tangy, savory flavor makes it an absolutely irresistible meal that your whole family will adore.
Print
Easy Chicken Piccata Recipe: A 30-Minute Weeknight Favorite
- Prep Time: 15
- Cook Time: 20
- Total Time: 35
- Yield: 4 servings 1x
- Category: dinner
- Method: Pan-frying and Simmering
- Cuisine: Italian
- Diet: Non-Alcoholic, Halal
Description
A quick Italian-inspired dish with tender pan-fried chicken cutlets and a zesty lemon-butter-caper sauce. Ready in 30 minutes, this elegant yet simple recipe pairs perfectly with pasta or vegetables, offering a tangy balance of flavors.
Ingredients
4 skinless, boneless chicken breasts (thinly sliced and pounded to 1/4-inch thickness)
Kosher salt and freshly ground black pepper (to taste)
1 cup all-purpose flour
1 cup panko bread crumbs
1 teaspoon lemon zest
3 tablespoons unsalted butter
2 tablespoons olive oil
1/2 cup drained capers (rinsed for halal preparation)
1/4 cup freshly squeezed lemon juice
Fresh parsley (chopped, for garnish)
Thin lemon slices (for garnish)
Instructions
Preheat oven to 200°F (95°C) to keep the chicken warm
Season both sides of each chicken cutlet with salt and pepper
In a shallow dish, combine flour and a pinch of salt
Dredge each cutlet in flour mixture, shaking off excess
Heat olive oil in a large skillet over medium heat
Cook chicken in the skillet for 2-3 minutes per side until golden and crispy
Transfer cooked chicken to oven-safe dish and keep warm
Add butter to the skillet; once melted, stir in capers, lemon zest, and lemon juice
Simmer the sauce for 5 minutes until golden and reduced
Return chicken to the skillet, spoon sauce evenly over each piece
Garnish with parsley and lemon slices before serving
Notes
Pound chicken in a plastic bag for easier preparation
Use panko for a lighter, crispier coating
Adjust lemon juice quantity to taste
Simmer sauce until it reaches desired consistency; add chicken broth if needed
Serve immediately for best flavor balance
Nutrition
- Serving Size: 1 chicken cutlet with 1/4 cup sauce
- Calories: 450
- Sugar: 1g
- Sodium: 1200mg
- Fat: 35g
- Saturated Fat: 12g
- Carbohydrates: 15g
- Fiber: 1g
- Protein: 40g
- Cholesterol: 180mg